It often happens that after a long work without failures, the computer completely unexpectedly fails. At the same time, the manifestations of breakdowns and their causes can be very different. In any case, the computer should first be diagnosed for malfunctions in order to understand which element of the PC is to blame for the malfunctions.
PC won't turn on
If after pressing the power button the computer does not react in any way, the problem is most likely in the power supply. A simpler case is the failure of the button itself.
Inspection
It is not uncommon for the switch on the back of the power supply to be set to the "Off" position. In this case, the solution to the problem will be the simplest.
Connectors
If a cursory external examination did not bring results, further diagnostics of the computer for malfunctions will require more complex actions. Remove the system case cover. Don't forget to unplug your PC first.
See if any connectors have come loose from the motherboard. It is best to turn them all off, wipe with alcohol or cologne. Then you will have to refer to the manual that comes with the motherboard. It will indicate where to connect all the wires.
With this approach, several possible causes of a malfunction can be excluded at once: oxidation of contacts; incorrect connection of wires; random breaks in the circuit.
Button
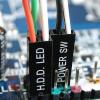
If the previous steps have not worked, troubleshooting the computer should continue after disconnecting the power button connector. As you can see in the process of work, it is connected to two pins of the motherboard. Close them with any metal object, such as a paper clip.
If after that the PC turned on, most likely the power button is broken. To temporarily eliminate the inconvenience caused by this problem, you can simply change the assignment of the "Reset" key by connecting its wire to the "Power On" connector on the motherboard. That is, to the one that was closed with a paper clip earlier. Now, to start the PC, you will need to press the reset button on the system unit.

The second possible malfunction with the same symptom is the "Reset" keys. In order to check this diagnosis, you should simply disconnect the wire coming from the reset button, and then try to turn on the computer in the usual way.
Nutritional issues
If the paper clip didn't work, it's likely that the motherboard isn't getting the power it needs. In this case, computer diagnostics for malfunctions should continue by checking the ATX and P4 connectors.

ATX is a wide connector that has 24 pins. P4 is shaped like a square and has four wires going to it (sometimes up to eight wires). Just unplug and then plug the connectors back in.
Power Supply
If the previous actions did not lead to a positive result, the PSU failed, but so far the probability of this is not one hundred percent. Further computer diagnostics at home will require connecting a known-good power supply to the PC.
The easiest way to complete this step is if you have several computers at home. Otherwise, you will have to contact the service center. Buying a new power supply to diagnose problems is not the best option, because the device may be working, and the problem manifests itself due to other problems.
Motherboard
After replacing the power supply, the computer does not turn on? We can say that in this case, the computer hardware diagnostics is completed, and the motherboard is out of order. It is best to replace it immediately, the repair of such equipment does not justify itself, since the price of this procedure may be higher than that of a new device.
Work failures
If problems arise unexpectedly and haphazardly during its operation, computer system diagnostics should begin with updating the most important software. It includes OS, drivers, antivirus. If no protection tools are installed, it is worth installing them, and then performing a full computer scan for viruses.
RAM
Often, the stability of the PC is disturbed due to a malfunction of the RAM. There are many applications for checking it. However, Memtest86+ is considered the best. You can download and use it absolutely free.
Before testing, you will need to prepare a bootable USB flash drive.
- Download the distribution package of the program. At this step, it is important to select the USB INSTALLER and not the ISO image.
- After that run the executable. Its extension is EXE and its name starts with "Memtest".
- A window will appear on the screen that will ask if you agree with the terms of the license agreement. Since it is impossible to start the program without confirmation, you should click on the "I Agree" button.
- In the next step, you will need to select the USB drive to which the application data will be copied. Be careful: all information from the flash drive can be deleted during the installation process.
- Now it remains to click on the inscription "Create". Wait for the computer diagnostic program to complete the installation, and then click on "Finish"
Now restart your PC and enter the BIOS. To do this, press the "DEL" button when the computer is just starting to turn on. After launching the BIOS setup utility, go to the "Advanced" menu. In it, select the "First Boot Device" item and switch the parameter to "USB".
Restart your computer again. If all the previous points have been completed correctly, the computer diagnostic program will load. The RAM check should start automatically. It is advisable to follow the messages on the screen, sometimes before the test you will be asked to perform the procedure in safe mode. In this case, you need to press the "F1" button to start.

Memtest86+ runs 11 tests. In this case, after the completion of the latter, the procedure will begin again. If errors are found in the RAM, a red area with their description will appear on the monitor screen. If no problems are found after a full check, the application will display the message "Press ESC to exit".
If errors are found during the tests, the RAM should be replaced. If there are several RAM sticks, computer diagnostics and repair involve checking each of them separately. To do this, you need to install them in the system unit one by one, and after the change, turn on the Memtest86+ utility again. By identifying the failed device, you can continue to use your computer without it, with some performance loss but no crashes.
Cooling system
If problems occur while running resource-intensive applications, it is highly likely that the PC cooling system is not working efficiently enough. The problem is exacerbated by the dust that settles in the radiators. As a result, the flow of cool air blown by the fan becomes unable to blow through all the metal parts of the heat exchanger.
To detect overheating, a program can be used. In this case, diagnosing a computer for malfunctions will require the user only to install the appropriate application and monitor the performance of the sensors.
AIDA64
One of the best utilities for monitoring computer temperature is AIDA64. After starting the program, you will need to select the "Service" item in the top menu, and then - "System stability test". A window with graphs will appear on the screen. They will display the temperature of all major PC components.
After clicking on the "Preferences" button, you can independently choose which sensor data will be displayed on the charts. Since it is impossible to diagnose a computer for overheating when the computer is running in gentle mode, a special test should be run. To check how the PC behaves while using the processor at the maximum level, in the upper left corner, check the boxes next to "Stress CPU" and "Stress FPU".

It is advisable not to leave the device during this check and carefully monitor the data provided by the program. Since diagnosing a computer is only half the battle, in addition to identifying problems, you must also prevent them from damaging your PC. If critical temperatures are exceeded, you should stop the test and think about replacing the cooling system. It will not be superfluous to blow out the radiators from dust, and then check the temperature again at maximum load.
Crashes during games
If computer errors occur during games or other applications that actively use the graphics system, computer diagnostics can be performed using the FurMark program.

After launch, the settings window will open. In it, it is advisable to select the maximum resolution supported by the monitor, and also check the "FullScreen" checkbox. Now it remains to click on the inscription "Stress Test".
A three-dimensional image will appear on the screen, but you should not observe it. The main attention should be focused on the graph, which will be displayed below. It shows the temperature of the video processor. When critical values are reached, press the "ESC" button to exit the benchmark.
Image defects
If the monitor displays incorrect colors during operation, this problem is often solved by simply replacing the cable. Diagnostics and initially involve checking components. Try tightening the screws securing the plug. If this does not help, you can wipe the contacts with alcohol, and also check the operation of the cable on another computer or monitor.
Did the previous steps not work? Update or reinstall your video driver. It is also not superfluous to test the graphics card for overheating, as described above.

No sound
How to diagnose a computer and identify a malfunction if the sound is gone? Typically, these problems appear after installing a new video card or graphics adapter. Almost all such modern devices come with an HDMI output through which sound can be output. And along with the increase in sound-reproducing devices, there is a risk of incorrect auto-tuning.
Launch any player and turn on the music in it. Click on the speaker icon in the system tray, and then click on the inscription "Playback devices". In the left column of the window that opens, right-click on each device, and indicate to the OS that it should be used by default.
If the sound still does not appear, diagnosing a computer at home will require additional steps. Check the wires that connect to the output of the audio board. The easiest way to do this is to disconnect the plug from the computer connector and connect it to any other audio device (player, mobile phone).
If there is still no sound in the speakers, try replacing the cable. The audio system is silent even after this procedure? This means that the computer is fully functional, and the replacement requires "acoustics".
HDD problems
How to diagnose a computer when the hard drive is not displayed in either Explorer or BIOS? Start by checking the cables. The easiest way is to use a cable from the HDD that works stably. If such a measure did not help, there is a high probability of a breakdown of the drive itself. In this case, further attempts to repair at home will not lead to positive results. Data recovery from this HDD can only be performed by a specialist.
If the information from the hard disk can be read, but the OS stopped on it cannot be loaded, then the MBR (boot record) has been damaged. To resolve this issue, boot from the Windows installation disc. In the menu, click on "Repair your computer", and then - "Repair bootloader".
Primary diagnostics can be done by the signals that are played when the computer starts. To do this, you need to know the breakdown coding tables. Each BIOS developer (AMI, AWARD, PHOENICS) uses its own code for the type of malfunction. One short beep means for everyone that the initial test (POST) has passed, no errors were found. After that, everyone is different. The absence of any signals means that the system does not start when power is applied and the enable signal is applied.
Determination of computer malfunction by BIOS signals
Sometimes you can tell a hardware problem from a software problem by the change in computer behavior after a power outage (as opposed to a software reset).
Many computer problems can be identified (or at least know which direction to look for) by fatal BSOD errors in Windows, but for this you need to make Windows itself work.
Processor failure
The computer restarts cyclically, does not start, there is no boot from the hard disk; Windows does not install, Windows does not boot, the processor or processor power parts on the motherboard are very hot. Sometimes programs work with errors. Newer processors have a built-in memory controller, sometimes memory malfunction is due to a faulty processor. An Intel processor failure is extremely rare, burned AMD processors are much more common. The processor can burn out due to improper assembly if the pins of the board or processor socket are bent, causing a short circuit. In this case, the processor is replaced with a new one. A burnt processor is capable of “burning” the motherboard, it is dangerous to rearrange it in a new computer. It is difficult and risky to determine a processor malfunction at home.
Troubleshooting: Replacement only.
Memory failures
The computer does not boot, intermittent crashes occur, accompanied by a blue screen of death in Windows and its applications. RAM problems are reliably diagnosed by special reliable tests. Programs with low validity work quickly, but often do not detect a malfunction. Tests should be carried out on a motherboard that has a good memory controller (the controller may be in the processor, then you need to be sure that the processor is working). A memory test with a program of low validity (validity) can only confuse you and take extra time. Faulty memory should be replaced, it is pointless to repair. Since in modern systems the memory controller is usually located in the processor, when memory errors occur, the processor is the first to be suspected.
Motherboard failure
If the motherboard has failed, then the signs of this event are as follows: the computer does not turn on at all, or turns on but does not boot; USB, sound card, mouse, keyboard do not work; processor is cold Windows does not load or install, the processor overheats. An example of a computer motherboard malfunctioning when Windows would not boot due to memory errors.
If the BIOS of the motherboard is damaged (the chip burned out or the program is corrupted), the computer will turn on, but there will be no boot and no image. We can restore a faulty BIOS either by a new flashing on the programmer, or by replacing the flashed microcircuit.
Motherboards are rarely repaired, usually when capacitors need to be resoldered. The chip on the motherboard is expensive to change, about 6000 rubles.
For more information on diagnosing a motherboard malfunction, see here.
Troubleshooting: replacement, repair.
Hard drive problems
The disk does not spin up, is not detected in the BIOS of the motherboard; Windows does not boot, the computer restarts cyclically, freezes, slows down; program errors and crashes. Hard drives are worth repairing if the damage is minor or if they contain valuable information. A broken SATA cable and poor contact can also be the cause of a bad or unstable hard drive. You can diagnose poor cable quality by the UltraDMA CRC Errors parameter in .
Learn more about hard drive failures here.
Troubleshooting: replacement, repair.
Another frequently asked question related to the fact that Windows does not see an external hard drive that is connected via USB. First you need to check if the disk itself is spinning up. If there is complete silence or the disk attempts to spin up (does not gain momentum), then the disk does not start. Therefore, Windows does not see the HDD. The reasons may be the following: the drive does not have enough power to work (insert the second end of the splitter into USB), a bad cable (the performance of external hard drives greatly depends on the quality of the cable); disk controller in low quality box; connect incorrectly (for example, through the front USB connectors of the computer, but you need to connect to the motherboard from the back). Here are the main reasons why an external drive does not work.
Video card failure
Manifestations of a video card malfunction: garbage or artifacts on the monitor screen, often even before Windows loads; the computer does not boot (there is no characteristic boot sound signal); 3D games crash; the video card driver crashes and is not installed, games do not work, the 3DMARK test crashes. A typical cause of video adapter failure is overheating. The critical temperature for a video card chip is about 105º C. To avoid overheating, do not bring the card to such a temperature, do cleaning in a timely manner. The problem is being checked on another computer.
See the maximum temperatures for video cards here.
Power supply failure
The computer does not turn on with the button (power is not supplied to the board and fans), there is no boot from the hard disk, it restarts cyclically, the download stops. Power supplies have almost ceased to be repaired. A standard power supply costs the same as a repair.
Learn more about PSU failures.
Troubleshooting: replacing the power supply.
Network problem
If the network card is faulty, the computer may freeze when loading Windows and not boot. The problem may appear at night when you are away, the card may burn out even when the computer is turned off, the standby voltage is applied to the card. For diagnostics, you can disable the network card in the BIOS, or remove an additional one.
Read about the repair of the motherboard, power supply, computer video card here.
It is obvious that some signs of a malfunction are found in several computer components at once, and a lot of uncertainty arises in the diagnosis. Therefore, when diagnosing, it is more correct to talk about the probability of this breakdown. Proper diagnosis requires experience, equipment and replacement parts. Diagnosing and repairing a computer at home without being able to supply serviceable parts is problematic, but in professional centers it is easy and inexpensive. See computer repair prices.
Computer overheating.
Often, computer breakdowns occur due to overheating associated with excessive dustiness of the system unit inside. Dust is a good thermal insulator and prevents. Here is an example of what happens if the computer is not cleaned of dust. For this reason, the video card has become unusable.
Incompatibility
Component incompatibilities are a common cause of known-good devices not working. Most often, incompatibility occurs in a combination of Intel-AMD devices. For example, they replaced the video card with a new card from AMD, and the computer stopped starting.
Software malfunctions
Half of computer failures are due to software problems. This includes errors in the file system (which often occurs when power fails while writing to disk), OS (operating system) and its applications, drivers, as well as the effects of malware (viruses, trojans, spyware, etc.). Causes of infection: the consequences of visiting phishing sites, opening infected emails, downloading infected programs, poor anti-virus protection.
Read.
Software malfunctions should also include errors after replacing the motherboard due to a change in the hard disk controller.
The printer does not print from the computer
If the printer intermittently stops printing from the computer, then the following reasons are likely:
- most often the problem is with the print manager (you can check this by restarting the print manager or restarting the computer);
- malfunction of the motherboard chipset, in particular the South Bridge;
- bad USB cable, wrong or broken driver, printer problems (paper jam, out of cartridge, cover open, etc.)
If you need professional diagnostics or want to repair your computer with us, if you have a question about prices, terms, expediency, please contact us through the contact form. In the vast majority of cases, the cause of the breakdown cannot be determined without diagnostics.
Frequently asked Questions:
Question. Constantly pops up a blue screen with the inscription IRQ_NOT_ and something else.
Answer. Most likely, problems with RAM or driver.
Question. What to do if the blue screen of death appears?
Answer. A message is always written on the death screen, which can be used to determine the type of malfunction.
Question. The computer does not turn on when you press the power button, the fan twitches and stops.
Answer. Possibly faulty: motherboard; power supply (replace); short circuit protection is triggered (disconnect everything from the motherboard, even external USB, connect in turn).
Question. Periodically, the video card disappears from the system.
Answer. Probably a bad contact in the card slot - you need to clean it, or the card itself will fail.
Question. Can a video card get warm due to the power supply?
Answer. Never met.
Question. My mouse is slow on my computer. With a smooth movement of the hand, it twitches, jumps. Changed the mouse - does not help, everything is the same.
Answer. The mouse never slows down, and cannot slow down. Only the computer itself slows down, you need to figure out why: a hard drive, programs, a weak video card, a processor ...
Question. The fan on the processor began to work very noisily, buzzing almost continuously. I almost never heard before.
Answer. It's time to clean your computer from dust. Open the system unit and remove dust from all coolers. Read about cleaning a laptop.
Question. The computer does not see the TV via HDMI, but used to see and show movies. Contacts checked.
Answer. The HDMI port on either the TV or the computer burned out. You cannot connect an HDMI cable while the devices are turned on.
Question. Small horizontal stripes are visible on the monitor. Is it a matrix?
Answer. Most likely these are hints. Choose a different frame rate, such as 75Hz. Sometimes there is a horizontal flicker of the lines, a slight jitter. Removed the same way.
Question. The computer reports that the USB device is not recognized, but it worked before.
Answer. The electronics probably failed, usually in the USB interface.
Question. The correct resolution is not set on the monitor.
Answer. Turn on the monitor first, then restart Windows. A working system will automatically determine the desired monitor settings.
Question. The processor is constantly loaded at 100%.
Answer. Possible: weak processor, viruses, 2 antiviruses, extra resident programs, overheating. Launch the task manager and see which process is using the processor. If this is svhost, and there are no viruses, then it's easier to reinstall Windows.
Question. The hard drive disappears intermittently.
Answer. The problem is either in the controller on the motherboard, or in the hard drive, or in the cable (often a bad connection).
Question. The new computer started to slow down a lot.
Answer. You need to look at what processes are causing the processor to load. And check the hard drive for damage. And sometimes the computer slows down a lot when - if the cable fails, a large number of errors occur during data transfer, and until the disk transfers the necessary portion of data to the computer without errors, the transfer process is repeated. The cable needs to be replaced.
tweet
If you did not find the solution you need here - ask a question in Vkontakte group, I will try to help.
General issues
The computer slows down, freezes. What to do?
There are many reasons why a computer slows down. To begin with, the most obvious ones should be excluded - we check for viruses using.
Also make sure you have the latest drivers installed. For example, if games slow down, then it is possible that the reason is in the video driver. I talked about the drivers in detail
Running programs can also be the cause of the brakes. I advise you to clean autoload,. Also pay attention to the lower right corner of the screen - there are icons of some running programs near the clock, close them.
Another good tip to speed up your computer is.
The program gives an error. How to fix it?
A very common question. Unfortunately, users do not understand that the question is not addressed to a telepath. When asked necessarily you must specify the verbatim text of the error, actions leading to errors version installed operating system.
Usually, searching the text of the error on Google yields several solutions to the problem.
How to speed up your computer?
The tips are the same as when braking the computer. There are several articles on my site about .
Are there programs to speed up a computer?
Answer - No. There is only a set that allow the potential of the computer's computing power to be fully revealed. All kinds of accelerators are, if not lies, then obvious craftiness. Miracles don't happen. To make your computer run faster, install faster components.
Computer restarts while playing games. What to do?
There are many reasons. The most common:
- Overheating -
- Incorrectly working driver (about reinstalling the driver).
- Hardware problem. It can be detected by inserting a video card into another computer - if there is a reboot, the cause is a video card failure. Or, again, this is overheating, so check for overheating first.
The computer restarts by itself. How to solve this problem?
The most likely reason is BSOD. What is it and how to solve, read
It can also be overheating (see the question above).
Less common causes of spontaneous computer shutdown:
- short circuit of any connectors;
- a loose cord in the connector that goes from the outlet to the system unit;
- lack of grounding (yes, in addition to the phase and zero available in the sockets, it is highly desirable to connect a normal ground to the computer);
- power surges in the mains (need a stabilizer);
- failure of the power supply or motherboard.
The latter is difficult to diagnose at home. If you have ruled out all other reasons, take it to a service center for diagnostics.
The computer shows a blue screen with white text. What's this?
The computer is overheating. What to do?
What to do if there is no sound?
Most likely, the driver for the sound card is not installed. My installation advice is
Administrator rights are required to copy files to a flash drive. What to do?
The easiest way is to format the flash drive in FAT32 and the problem will disappear. When you need to transfer files larger than 4 GB each on a flash drive - .
Windows related questions
How to install Windows 8?
Where to download Windows 8?
How to install Windows 7?
Where to download Windows 7?
How much RAM do you need for Windows 7?
Minimum - 512 MB. Of course, the more, the better. Learn more about Windows 7 system requirements
How to create a USB flash drive with Windows installation?
To install Windows from a USB flash drive, you need to prepare it. The instruction is suitable for both Windows 7 and Windows 8.
How to boot from a boot disk, flash drive?
How to install two or more Windows on one computer?
You need to install Windows on different hard drive partitions or different hard drives. More about this There are a lot of instructions on this topic on the Internet.
What to do if Windows updates are not downloading?
Usually, an error code is reported. Type it into Google - most likely, the solution is already there.
Virus protection, security
Where to download free antivirus?
Programs
Where to download interesting programs?
A list of convenient program directories is located
Which programs can be uninstalled and which can't?
It all depends on the needs - both yours and laptops. Come in Control Panel - Programs and Features see the list. If any of the installed programs is unknown to you, type in its name in Google or Yandex. Knowing its purpose, you can decide whether to delete it or not.
How to clean your computer from unnecessary files?
There is a good program for this.
The program requires administrator rights. What to do?
Right-click on the shortcut / program file - Run as administrator. Why is this needed and how to simplify it, written
The virus has deleted files from the flash drive. How to recover?
The easiest way is with a free program. However, it is possible that the files were not deleted, but were simply hidden. How to "return" them and how to simplify this process, I told in.
How to format a flash drive?
Browsers
Sites in Google Chrome require you to update Flash Player, although the latest is already installed. What to do?
Open page chrome://plugins/, click on the right More, then disable all Flash Players except the newest version (you can see by the numbers which version is the latest).
Questions about Linux
Should I try installing Linux?
In my opinion, this is more than necessary. Even if no distribution from the Linux family suits you (Ubuntu, Kubuntu, Mint, Mandriva, Debian, Fedora, ALT Linux, etc.), you will get experience and your own opinion.
There are many distributions (assemblies, in other words) of Linux. Most often, novice users choose a distribution kit that is not suitable for their tasks, as a result they receive a negative opinion and forget about Linux as a nightmare. In fact, there are a great many distribution kits, for a very different range of tasks. Distributions differ in literally everything - from the kernel version to the set of installed programs. Externally, the interface is also very different due to different “desktop environments”: someone likes Gnome, someone likes KDE, someone likes XFCE or Openbox, IceWM…
OpenSUSE is a very good Linux distribution. First of all, I want to note a very flexible installer, thanks to which you can install only those programs that you need and refuse unnecessary ones. Of course, nothing prevents you from installing (or removing) programs in any version of Linux after installation, but this is essentially a waste of time. The OpenSUSE installer thus saves time. You can download OpenSUSE from the download page.
How to install Linux along with Windows?
On the one hand, there is nothing complicated there - just create free space on your hard drive, as I said here, then specify this place for installation to the Linux installer. On the other hand, there are plenty of pitfalls - either the installer will come across with errors, or it will be too incomprehensible, or something else ... Therefore, I recommend reading - using Ubuntu as an example, you can install any Linux distributions.
“I turned on the computer, the monitor started working, everything was buzzing in the system unit, everything seemed to work, but nothing on the monitor, even the BIOS did not crawl out. I removed the sidewall, moved the contacts, and so on several times. Something just died, enlighten? - one of the readers of my blog, Yuri, asked me this question.
Of course, the description below is not enough to solve such a problem. I can say with confidence that in 50% of cases it is necessary to visit the client to solve such a problem. However, I still want to somehow help most of my readers, and therefore I decided to describe the most typical PC failures.
I decided to write a cheat sheet containing solutions to the most common problems. I will present 6 such problems.
First situation: system unit does not turn on
First, check if the system unit is connected directly to the power supply and check also the reliability of the power cable connection.

The next step is to inspect the power cable itself. Pull it out and do a visual inspection, maybe it was pinched or something. Try, as an option, to replace the power cable with another one, for example, take it from the monitor or TV for now, if it fits.
Perhaps my article, dedicated to situations when the system unit does not start, will come in handy for you. Read it to the end, there is a link to the continuation.
Second situation: PC turns on but takes a long time to boot up or slows down
This situation is most common among most PC users. Most often, the fault of this behavior of the computer is the “garbage” accumulated during the period of using the PC in the system: installed and then incorrectly removed programs, errors in the Windows registry, as well as accumulated fragmented files.
In general, the PC needs a general cleaning. How to do this I described in the article. I advise you to regularly repeat the tips described there. And the performance will be on top, and extend the life of the computer.
Third situation: PC turns on but monitor doesn't
 The first thing you should pay attention to is the power cable. Do the same as described above with regards to the cable from the system unit. If the cable is good, pay attention to the light on the monitor: if the light is on, then the problem is most likely in the video card. Listen to see if the computer makes any sounds. If it does, check it out and troubleshoot.
If the problem is in the monitor itself, then the only thing you can do yourself is check the fuse. You will have to disassemble the monitor, but there is nothing to worry about, the main thing is to do everything carefully. Usually, the fuse in the monitor is located next to the power cable connector.
 You can check the fuse by a very simple method - continuity from both ends, sometimes you can determine the fuse failure visually. If it is not working, then it will be necessary, according to the existing sample, to purchase an analogue at the nearest radio equipment store.
Various kinds of noise and image distortion may appear from an insecurely connected power cable. If no color changes are observed when the cable is moved, then most likely the problem is not in it. By the way, the change in colors can only be noticed when connected via an analog VGA output.
Fourth situation: the graphics adapter is not working properly
A video card malfunction can occur both at the hardware (hardware) and at the software (driver) level. In the first case, you will need to very carefully remove the video card from the system unit and conduct a cursory inspection of it for the presence of swollen capacitors. If there are any, then we solder them, and replace them with new ones, or ask friends to do this.

Another common video adapter malfunction is overheating. This problem is solved very simply: by replacing the cooler (fan). It simply needs to be lubricated. Remember! Sunflower oil cannot be used for lubrication, because. over time, it thickens and, accordingly, over time, the video card will work even worse. Any silicone lubricant will work. 2-3 drops will be enough.
It is possible that the video card is “buggy” due to incorrectly installed drivers. In this case, come in handy with a video lesson.
fifth situation: mouse malfunction
The first thing that comes to mind is to check if your PC is frozen. Checking this is quite simple - press “Windows” (or “Win”), the Start menu should open. If there was no reaction, then the computer really hung. The way out of this situation is to restart the computer.
The second situation may be a breakdown of the mouse itself. Check cable for wired and batteries for wireless mouse. Change the USB port to which the mouse is connected. If there are sharp jumps of the mouse cursor across the monitor screen, then you will either have to replace it, or, if you wish, clean it yourself from debris (the mouse is very easy to disassemble).
sixth situation: faulty keyboard
Many of you, like me, often have something to eat or drink at the computer. Of course, crumbs, and sometimes spilled liquid, also get on the keyboard.
Even if you rarely crumble on the keyboard, I advise you to at least turn it over and shake it (you can without disconnecting from the PC). You will be surprised how many crumbs and dust have accumulated in it. If you accidentally spilled liquid on the keyboard, then the procedure is more complicated.

We wipe all the liquid from the table, turn the keyboard over, shake out everything that is there, disassemble it (after photographing the location of the keys), carefully remove all moisture, dry it (important: do not use a hair dryer), hold it disassembled for two days to dry it yourself . Next, we try to collect it. If it works, then we eat and drink drinks. If the keyboard is still faulty, then you can dispose of it and purchase another one.
Conclusion
So we sorted out the main malfunctions with you, learned how to fix them. The main thing is not to be afraid to do something with your own hands, it is both interesting and free. However, I wish you that your iron friends do not break. However, if this situation has already happened, first of all check whether the warranty is still valid.
When carrying out repair work, observe safety precautions, make sure that all components are de-energized. Not the last role in the success of the repair is the order on the desktop, since it is easy to lose small parts of the repaired assembly in a mess. Keep your PC clean and it will thank you with its stable performance!
Many PC owners are faced with various errors and failures in the computer, but cannot determine the cause of the problem. In this article, we will look at the main ways to diagnose a computer, allowing you to independently identify and fix various problems.
Keep in mind that high-quality computer diagnostics can take a whole day, allocate it in the morning specifically for this, and do not start everything in the late afternoon.
I warn you that I will write in detail as for beginners who have never disassembled a computer in order to warn about all the possible nuances that can lead to problems.
1. Disassembling and cleaning the computer
When disassembling and cleaning the computer, do not rush, do everything carefully so as not to damage anything. Store the accessories in a safe place prepared in advance.
It is not advisable to start diagnostics before cleaning, since you will not be able to identify the cause of the malfunction if it is caused by clogged contacts or the cooling system. Additionally, diagnostics may fail to complete due to repeated failures.
Unplug the system unit from the outlet at least 15 minutes before cleaning to allow the capacitors to discharge.
Perform disassembly in the following sequence:
- Disconnect all wires from the system unit.
- Remove both side covers.
- Disconnect the power connectors from the video card and remove it.
- Remove all memory sticks.
- Disconnect and remove the cables from all drives.
- Unscrew and remove all discs.
- Disconnect all power supply cables.
- Unscrew and remove the power supply.
There is no need to remove the motherboard, CPU cooler, case fans, you can also leave the DVD drive if it works fine.
Gently blow out the system unit and all components individually with a powerful stream of air from a vacuum cleaner without a dust bag.
Carefully remove the cover from the power supply and blow it through without touching the electrical components and the board with your hands and metal parts, as there may be voltage in the capacitors!
If your vacuum cleaner does not work for blowing out, but only for blowing in, then it will be a little more difficult. Clean it well so that it pulls as hard as possible. We recommend using a soft bristle brush when cleaning.

You can also use a soft brush to remove stubborn dust.

Thoroughly clean the CPU cooler heatsink, first considering where and how much dust it has clogged with dust, as this is one of the common causes of CPU overheating and PC crashes.

Also make sure that the cooler mount is not broken, the clamp is not open and the heatsink is firmly pressed against the processor.
Be careful when cleaning the fans, do not let them spin too much and do not bring the vacuum cleaner nozzle close if it is without a brush, so as not to beat off the blade.
At the end of cleaning, do not rush to collect everything back, but proceed to the next steps.
2. Checking the motherboard battery
The first thing after cleaning, so as not to forget later, I check the battery charge on the motherboard, and at the same time reset the BIOS. In order to pull it out, you need to press the latch with a flat screwdriver in the direction indicated in the photo and it will pop out by itself.

After that, you need to measure its voltage with a multimeter, optimally if it is in the range of 2.5-3 V. The initial voltage of the battery is 3 V.

If the battery voltage is below 2.5 V, then it is advisable to change it already. The voltage of 2 V is critically low and the PC is already starting to fail, which manifests itself in resetting the BIOS settings and stopping at the beginning of the PC boot, prompting you to press F1 or some other key to continue booting.
If you do not have a multimeter, you can take the battery with you to the store and ask them to check it or just buy a replacement battery in advance, it is standard and very inexpensive.
A clear sign of a dead battery is the constantly flying date and time on the computer.
The battery needs to be changed in a timely manner, but if you don’t have a replacement on hand now, then simply do not disconnect the system unit from the power supply until you change the battery. In this case, the settings should not fly off, but problems can still arise, so do not delay.
Checking the battery is a good time to completely reset the BIOS. This resets not only the BIOS settings, which can be done through the Setup menu, but also the so-called volatile CMOS memory, which stores the parameters of all devices (processor, memory, video card, etc.).
Errors inCMOSare often the cause of the following problems:
- computer does not turn on
- turns on once
- turns on and nothing happens
- turns on and off
I remind you that before resetting the BIOS, the system unit must be unplugged from the outlet, otherwise the CMOS will be powered by the PSU and nothing will work.
To reset the BIOS for 10 seconds, close the contacts in the battery connector with a screwdriver or other metal object, this is usually enough to discharge the capacitors and completely clear the CMOS.

A sign that the reset has occurred will be a lost date and time that will need to be set in the BIOS the next time the computer boots.
4. Visual inspection of components
Carefully inspect all capacitors on the motherboard for swelling and leakage, especially in the area of \u200b\u200bthe processor socket.

Sometimes capacitors do not bulge up, but down, which causes them to tilt as if they were just slightly bent or unevenly soldered.
If some capacitors are swollen, then you need to send the motherboard for repair as soon as possible and ask to re-solder all the capacitors, including those that are next to the swollen ones.
Also inspect the capacitors and other elements of the power supply, there should be no swelling, drips, signs of burning.

Inspect the disc contacts for oxidation.

They can be cleaned with an eraser and after that it is imperative to replace the cable or power adapter with which this disk was connected, since it is already damaged and oxidation has most likely occurred due to it.
In general, check all the cables and connectors so that they are clean, with shiny contacts, tightly connected to the drives and the motherboard. All cables that do not meet these requirements must be replaced.
Check that the wires from the front of the case to the motherboard are connected correctly.

It is important that the polarity is observed (plus to plus, minus to minus), since there is a total mass on the front panel and non-observance of the polarity will lead to a short circuit, due to which the computer may behave inappropriately (turn on every other time, turn itself off or reboot) .
Where the plus and minus in the contacts of the front panel is indicated on the board itself, in the paper manual for it and in the electronic version of the manual on the manufacturer's website. On the wire contacts from the front panel, it is also indicated where the plus and minus are. Usually the white wire is negative, and the positive connector can be indicated by a triangle on the plastic connector.

Many even experienced builders make a mistake here, so check.
5. Checking the power supply
If the computer did not turn on at all before cleaning, then do not rush to assemble it, the first thing to do is check the power supply. However, in any case, it won’t hurt to check the PSU, maybe it’s because of it that the computer fails.
Check the power supply when fully assembled to avoid electric shock, short circuit, or accidental fan failure.
To check the power supply, short the only green wire in the motherboard connector with any black one. This will signal to the PSU that it is connected to the motherboard, otherwise it will not turn on.

Then turn the power supply into the surge protector and press the button on it. Do not forget that the power supply itself may also have an on / off button.
A spinning fan should be a sign of turning on the power supply. If the fan does not spin, then it may have failed and needs to be replaced.
In some silent power supplies, the fan may not start spinning immediately, but only under load, this is normal and can be checked during PC operation.
Use a multimeter to measure the voltage between the pins in the connectors for peripheral devices.

They should be approximately in the following range.
- 12 V (yellow-black) - 11.7-12.5 V
- 5 V (red-black) - 4.7-5.3 V
- 3.3 V (orange-black) - 3.1-3.5 V
If any voltage is missing or goes far beyond the specified limits, then the power supply is faulty. It is best to replace it with a new one, but if the computer itself is inexpensive, then repairs are allowed, PSUs lend themselves to this easily and inexpensively.
The start of the power supply and normal voltages is a good sign, but in itself it does not mean that the power supply is good, since failures can occur due to voltage drops or ripple under load. But this is already determined in the subsequent stages of testing.
6. Checking the power contacts
Be sure to check all electrical contacts from the outlet to the system unit. The socket must be modern (for a European plug), reliable and not loose, with clean elastic contacts. The same requirements apply to the surge protector and cable from the computer power supply.
Contact must be reliable, plugs and connectors must not dangle, spark or be oxidized. Pay close attention to this, as poor contact is often the cause of failure of the system unit, monitor, and other peripheral devices.
If you have a suspicion of a power outlet, surge protector, power cable for a system unit or monitor, then change them as soon as possible to avoid damaging your computer. Do not delay and do not skimp on this, as repairing a PC or monitor will cost significantly more.
Also, poor contact is often the cause of PC failures, which are accompanied by a sudden shutdown or reboot, followed by failures on the hard drive and, as a result, disruption of the operating system.
More failures can occur due to voltage drops or ripples in the 220 V network, especially in the private sector and remote areas of the city. In this case, failures can occur even when the computer is idle. Try to measure the voltage at the outlet immediately after a spontaneous shutdown or reboot of the computer and observe the readings for a while. So you can identify long-term drawdowns, from which a linear-interactive UPS with a stabilizer will save.
7. Assembling and turning on the computer
After cleaning and inspecting the PC, carefully assemble it and carefully check that you have connected everything you need. If the computer refused to turn on before cleaning or turned on every other time, then it is advisable to connect the components in turn. If there were no such problems, then skip the next section.
7.1. Step by step PC build
First, connect the motherboard power connector and the processor power connector to the motherboard with the processor. Do not insert RAM, video card and do not connect disks.
Turn on the power of the PC and if everything is fine with the motherboard, the CPU cooler fan should spin. Also, if a buzzer is connected to the motherboard, a beep code usually sounds, indicating the lack of RAM.
Memory installation
Turn off the computer with a short or (if not possible) long press of the power button on the system unit and insert one stick of RAM into the colored slot closest to the processor. If all slots are the same color, then just the one closest to the processor.
Make sure that the memory bar is inserted evenly, all the way and the latches snap into place, otherwise it may be damaged when you turn on the PC.

If the computer starts up with one memory bar and there is a beep, then a code usually sounds, signaling that there is no video card (if there is no integrated graphics). If the beep code indicates problems with the RAM, then try inserting another bar in the same place. If the problem continues or if there is no other bar, then move the bar to another nearest slot. If there are no sounds, then everything is probably fine, continue on.
Turn off the computer and insert the second stick of memory into the slot of the same color. If the motherboard has 4 slots of the same color, then follow the instructions for the motherboard so that the memory is in the slots recommended for dual-channel mode. Then turn it on again and check if the PC turns on and what beeps it makes.
If you have 3 or 4 sticks of memory, then just insert them in turn, each time turning off and on the PC. If the computer does not start with a certain bar or gives a memory error code, then this bar is faulty. You can also check the motherboard slots by rearranging the work bar in different slots.
Some motherboards have a red indicator that glows in case of memory problems, and sometimes a segment indicator with an error code, the decoding of which is in the motherboard manual.

If the computer starts, then further memory testing occurs at another stage.
Installing a graphics card
It's time to test the video card by inserting it into the top PCI-E x16 slot (or AGP for older PCs). Do not forget to connect additional power to the video card with the appropriate connectors.

With a video card, the computer should start normally, without beeps, or with a single beep, indicating a normal self-test.
If the PC does not turn on or emits a beep error code for the video card, then it is most likely defective. But do not rush to conclusions, sometimes you just need to connect a monitor and keyboard.
Monitor connection
Turn off the PC and connect the monitor to the video card (or motherboard if there is no video card). Make sure that the connector to the video card and the monitor is connected tightly, sometimes tight connectors do not go all the way, which is the reason for the lack of image on the screen.

Turn on the monitor and make sure that the correct signal source is selected on it (the connector to which the PC is connected, if there are several).

Turn on the computer and a graphic splash screen and motherboard text messages should appear on the screen. Usually this is a suggestion to enter the BIOS using the F1 key, a message about the absence of a keyboard or boot devices, this is normal.

If the computer turns on silently, but there is nothing on the screen, there is most likely something wrong with the video card or monitor. The video card can only be checked by moving it to a working computer. The monitor can be connected to another working PC or device (laptop, player, tuner, etc.). Do not forget to select the desired signal source in the monitor settings.
Keyboard and mouse connection
If everything is fine with the video card and monitor, then we move on. In turn, connect the keyboard first, then the mouse, each time turning off and on the PC. If the computer freezes after connecting the keyboard or mouse, then they need to be replaced - it happens!
Connecting Drives
If the computer starts with a keyboard and mouse, then we begin to connect hard drives in turn. Connect a second drive without an operating system (if any) first.
Do not forget that in addition to connecting the interface cable to the motherboard, you also need to connect the connector from the power supply to the disk.
Then turn on the computer and if it comes to BIOS messages, then everything is fine. If the PC does not turn on, freezes or turns off by itself, then the controller of this disk is out of order and needs to be changed or taken in for repair to save data.
Turn off the computer and connect the DVD drive (if any) with an interface cable and power supply. If after that problems arise, then the drive fails in power supply and needs to be changed, it usually does not make sense to repair.
At the end, we connect the main system disk and prepare to enter the BIOS for initial setup before starting the operating system. We turn on the computer and if everything is fine, proceed to the next step.
When you turn on your computer for the first time, enter the BIOS. Usually, the Delete key is used for this, less often others (F1, F2, F10 or Esc), which is indicated in the prompts at the beginning of the download.

On the first tab, set the date and time, and on the “Boot” tab, select your hard drive with the operating system as the first boot device.
On older motherboards with a classic BIOS, it might look like this.

On more modern ones with a graphical shell, UEFI is a little different, but the meaning is the same.

To exit the BIOS and save the settings, press F10. Do not get distracted and watch the operating system fully boot to notice possible problems.
After the PC has finished booting, check if the fans of the processor cooler, power supply and video card are working, otherwise it makes no sense to carry out further testing.
Some modern video cards may not turn on the fans until a certain temperature of the video chip is reached.
If any of the case fans are not working, then this is not a problem, just plan to replace it in the near future, do not be distracted by it now.
8. Error analysis
Here, in fact, diagnostics begin, and all of the above was only preparation, after which many problems could go away and without it it made no sense to start testing.
8.1. Enabling memory dumps
If blue screens of death (BSOD) appear during computer operation, this can greatly facilitate the identification of a malfunction. A prerequisite for this is the presence of memory dumps (or at least self-written error codes).
To check or enable the dump recording function, press the key combination "Win + R" on the keyboard, enter "sysdm.cpl" in the line that appears and press OK or Enter.

In the window that appears, go to the "Advanced" tab and in the "Startup and Recovery" section, click the "Options" button.

The "Write debug information" field should be "Small memory dump".

If so, then you should already have previous error dumps in the C:\Windows\Minidump folder.

If this option was not enabled, then dumps were not saved, enable it at least now to be able to analyze errors if they are repeated.
Memory dumps may not be able to be created during severe crashes such as rebooting or shutting down the PC. Also, some system cleaning utilities and antiviruses can remove them, you must disable the system cleaning function for the duration of the diagnosis.
If there are dumps in the specified folder, then proceed to their analysis.
8.2. Memory dump analysis
To analyze memory dumps in order to identify what causes failures, there is a wonderful BlueScreenView utility, which you, along with other diagnostic utilities, can download in the "" section.

This utility shows the files that have failed. These files belong to the operating system, device drivers or some program. Accordingly, by the ownership of the file, you can determine which device or software was the cause of the failure.
If you cannot boot your computer in normal mode, then try booting into safe mode by holding down the "F8" key immediately after the disappearance of the motherboard graphic splash screen or BIOS text messages.

Go through the dumps and see which files appear most often as the culprits of the crash, they are highlighted in red. Right-click on one of these files and view its Properties.

In our case, it is easy to determine that the file belongs to the nVidia video card driver and most of the errors were caused by it.

In addition, in some dumps, the file "dxgkrnl.sys" appeared, even from the name of which it is clear that it refers to DirectX, which is directly related to 3D graphics. So, it is most likely that the video card is to blame for the failure, which should be subjected to thorough testing, which we will also consider.
In the same way, you can determine that the cause of the failure is a sound card, network card, hard drive, or some kind of program that gets deep into the system such as an antivirus. For example, if a disk fails, the controller driver will crash.
If you cannot determine which driver or program a particular file belongs to, then look for this information on the Internet by the name of the file.
If failures occur in the sound card driver, then most likely it is out of order. If it is integrated, then you can disable it through the BIOS and install another discrete one. The same can be said about the network card. However, network failures can be caused, which often resolves by updating the network card driver and connecting to the internet through a router.
In any case, do not make hasty conclusions until the diagnostics are completed, maybe your Windows just crashes or a virus has climbed, which is solved by reinstalling the system.
Also in the BlueScreenView utility, you can see the error codes and inscriptions that were on the blue screen. To do this, go to the "Options" menu and select the "Blue Screen in XP Style" view or press the "F8" key.

After that, switching between errors, you will see how they looked on the blue screen.

By the error code, you can also find a possible cause of the problem on the Internet, but it is easier and more reliable to do this by file ownership. You can use the F6 key to return to the previous view.
If different files and different error codes appear in errors all the time, then this is a sign of possible problems with RAM, in which everything crashes. We will diagnose it first of all.
9. Testing RAM
Even if you think that the problem is not in the RAM, still check it first. Sometimes a place has several problems, and if the RAM fails, then diagnosing everything else is quite difficult due to frequent PC failures.
Running a memory test from a boot disk is a must, as it is difficult to get accurate results on a Windows operating system on a failed PC.
In addition, "Hiren's BootCD" contains several alternative memory tests in case "Memtest 86+" does not start and many more useful utilities for testing hard drives, video memory, etc.
You can download the "Hiren's BootCD" image in the same place as everything else - in the "" section. If you do not know how to burn such an image to a CD or DVD, refer to the article where we reviewed, everything is done in the same way.
Set BIOS to boot from DVD drive or use Boot Menu as described in , boot from Hiren's BootCD and run Memtest 86+.

Testing can last from 30 to 60 minutes, depending on the speed and amount of RAM. One full pass should be completed and the test will go for the second round. If everything is fine with the memory, then after the first pass (Pass 1) there should be no errors (Errors 0).

After that, testing can be interrupted using the "Esc" key and the computer will restart.
If there were errors, then you will have to test each bar separately, taking out all the others to determine which one is broken.
If the broken bar is still under warranty, then take a photo from the screen using a camera or smartphone and present it to the warranty department of the store or service center (although in most cases this is not necessary).
In any case, it is not advisable to use a PC with a broken memory and carry out further diagnostics before replacing it, as various incomprehensible errors will pour in.
10. Preparation for component tests
Everything else, except for RAM, is tested from under Windows. Therefore, in order to exclude the influence of the operating system on the test results, it is advisable to do, if necessary, temporarily and most.
If this is difficult for you or there is no time, then you can try testing on the old system. But, if failures occur due to malfunctions in the operating system, some kind of driver, program, virus, antivirus (i.e., in the software part), then testing the hardware will not help determine this and you may go the wrong way. And on a clean system, you will have the opportunity to see how the computer behaves and completely eliminate the influence of the software component.
Personally, I always do everything right from start to finish as described in this article. Yes, it takes a whole day, but neglecting my advice, you can fight for weeks without determining the cause of the problem.
The fastest and easiest way is to test the processor, unless of course there are obvious signs that the problem is, say, in the video card, which we will discuss below.
If your computer, after some time after turning on, starts to slow down, freezes when watching videos, in games, suddenly reboots or turns off under load, then there is a possibility of overheating of the processor. In fact, this is one of the most common causes of such problems.
At the stage of cleaning and visual inspection, you should have made sure that the CPU cooler is not clogged with dust, its fan rotates, and the heatsink is firmly pressed against the processor. I also hope you didn't take it off when you cleaned it, as that requires replacing the thermal paste, which I'll talk about later.
We will use "CPU-Z" for the stress test with the processor warming up, and "HWiNFO" for monitoring its temperature. Although it is better to use the proprietary utility of the motherboard to monitor the temperature, it is more accurate. For example, ASUS has "PC Probe".
To begin with, it would be nice to know the maximum allowable thermal package of your processor (T CASE). For example, for my Core i7-6700K it is 64°C.

You can find out by going to the manufacturer's website from an Internet search. This is the critical temperature in the heat spreader (under the processor cover), the maximum allowed by the manufacturer. Don't confuse it with the temperature of the cores, which is usually higher and is also displayed in some utilities. Therefore, we will focus not on the temperature of the cores according to the processor sensors, but on the overall temperature of the processor according to the readings of the motherboard.
In practice, for most older processors, the critical temperature above which failures begin is 60 °C. The most modern processors can work at 70 ° C, which is also critical for them. You can find out the real stable temperature of your processor from tests on the Internet.
So, we launch both utilities - “CPU-Z” and “HWiNFO”, find the processor (CPU) temperature sensor in the motherboard indicators, run the test in “CPU-Z” with the “Stress CPU” button and monitor the temperature.

If after 10-15 minutes of the test the temperature is 2-3 degrees lower than the critical one for your processor, then there is nothing to worry about. But, if there were failures under high load, then it is better to run this test for 30-60 minutes. If during testing the PC freezes or reboots, then you should think about improving the cooling.
Keep in mind that a lot also depends on the temperature in the room, it is possible that in cooler conditions the problem will not manifest itself, but in hotter conditions it will immediately make itself felt. So you always need cooling with a margin.
In case of CPU overheating, check if your cooler complies with . If not, then you need to change it, no tricks will help here. If the cooler is powerful enough, but can't cope a little, then you should change the thermal paste for a more efficient one, and at the same time the cooler itself may be installed more successfully.
From inexpensive, but very good thermal pastes, I can recommend Artic MX-4.

It should be applied in a thin layer, after removing the old paste dry and then with cotton wool soaked in alcohol.
Replacing thermal paste will give you a gain of 3-5 ° C, if this is not enough, then simply install case fans, at least the most inexpensive ones.
14. Drive testing
This is the longest stage after the RAM test, so I prefer to leave it for last. To begin with, you can test the speed of all disks using the HDTune utility, to which I give "". This sometimes helps to identify freezes when accessing the disk, which indicates problems with it.

Look at the SMART options, where "disk health" is displayed, there should be no red lines and the overall status of the disk should be "OK".

You can download the list of the main SMART parameters and what they are responsible for in the "" section.
A full surface test can be performed using the same utilities from under Windows. The process can take 2-4 hours depending on the size and speed of the disk (about 1 hour for every 500 MB). At the end of the test, there should not be a single broken block, which are highlighted in red.

The presence of such a block is an unequivocal verdict for the disk and a 100% guarantee case. Save your data faster and change the drive, just don't tell the service that you dropped your laptop
You can check the surface of both conventional hard drives (HDD) and solid state drives (SSD). The latter really do not have any surface, but if the HDD or SSD drive freezes every time during the check, then the electronics most likely fail - you need to change or repair (the latter is unlikely).
If you are unable to diagnose the disk from under Windows, the computer crashes or freezes, then try to do this using the MHDD utility from the Hiren's BootCD boot disk.
Problems with the controller (electronics) and the disk surface lead to windows with errors in the operating system, short-term and complete freezes of the computer. Usually these are messages about the impossibility to read a particular file and memory access errors.

Such errors can be mistaken for problems with the RAM, while the disk may well be to blame. Before you panic, try updating the disk controller driver, or vice versa, return the native Windows driver as described in.
15. Testing the optical drive
To check an optical drive, it is usually enough to simply burn a verification disc. For example, using the Astroburn program, it is in the "" section.

After burning a disc with a message about successful verification, try to completely copy its contents on another computer. If the disc is readable and the drive reads other discs (except for poorly readable ones), then everything is fine.
Drive problems I've encountered include electronic failures that completely hung up or prevented the computer from turning on, breakage of the retractable mechanism, contamination of the laser head lens, and breakage of the head as a result of improper cleaning. In most cases, everything is solved by replacing the drive, since they are inexpensive and even if they have not been used for several years, they die from dust.
16. Hull check
The case also sometimes breaks, then the button sticks, then the wiring from the front panel falls off, then it closes in the USB connector. All this can lead to unpredictable behavior of the PC and is solved by a thorough inspection, cleaning, tester, soldering iron and other improvised means.
The main thing is that nothing is short, which may be indicated by a broken light bulb or connector. If in doubt, disconnect all wires from the front of the case and try to work at the computer for a while.
17. Checking the motherboard
Often, checking the motherboard comes down to checking all the components. If all the components individually work fine and pass the tests, the operating system is reinstalled, but the computer still crashes, it may be the motherboard. And here I won’t help you, only an experienced electronics engineer can diagnose it and identify a problem with a chipset or processor socket.
The exception is the crash of a sound or network card, which is solved by disabling them in the BIOS and installing separate expansion cards. You can resolder the capacitors in the motherboard, but let's say replacing the north bridge, as a rule, is not advisable, since it is expensive and there are no guarantees, it is better to immediately buy a new motherboard.
18. If nothing helps
Of course, it's always better to find the problem yourself and determine the best way to solve it, as some unscrupulous repairmen strive to hang noodles on your ears and tear off three skins.
But it may be that you follow all the recommendations, but you will not be able to determine the problem, it happened to me. In this case, the matter is more often in the motherboard or in the power supply, maybe there is a microcrack in the textolite and it makes itself felt from time to time.
In this case, nothing can be done, bring the entire system unit to a more or less well-established computer company. No need to wear parts in parts, if you are not sure what the matter is, then the issue will never be resolved. Let them figure it out, especially if the computer is still under warranty.
Computer store specialists usually do not worry, they have a lot of different components, they just change something and see if the problem is gone, thus fixing the problem quickly and simply. They also have enough time to conduct tests.
19. Links
Transcend JetFlash 790 8GB
Hard drive Western Digital Caviar Blue WD10EZEX 1 TB
Transcend StoreJet 25A3 TS1TSJ25A3K